
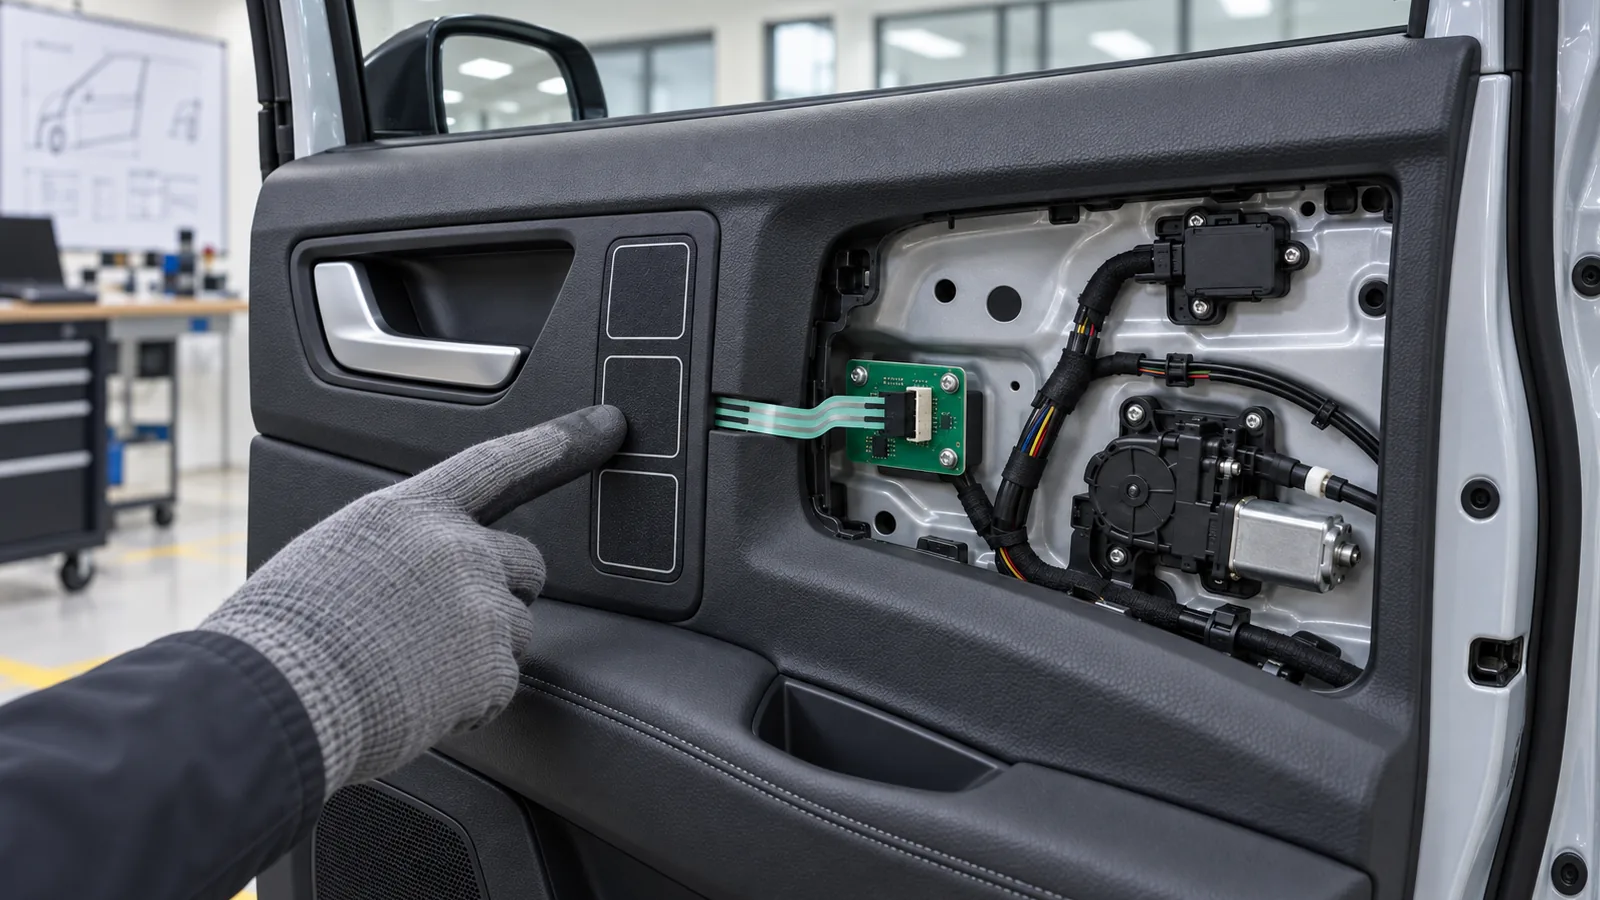
Treat the local electric-door button as a command interface, not as the door-control system. The component package can include the printed or blank key surface, tactile structure, membrane circuit, support layers, adhesive, flexible tail and named connector. The vehicle maker or system integrator should retain ownership of the controller, actuator, obstacle sensors, door-motion strategy, diagnostics, manual fallback and final safety validation. A first enquiry can start with the desired local command, available mounting zone, connector location and target quantities. Quotation assumptions must stay visible, and a mounted sample should confirm feel, reach and integration before controlled files are released for production.
A current electric-door feature exposes the sourcing boundary
Porsche's September 16 product update says optional electrically operated doors can be commanded through cabin buttons, exterior or interior handles, the central display and a digital key. It also says sensors stop movement when an obstacle is detected and that manual operation remains possible.
That is useful downstream context because one door function can accept several input paths. It does not identify Baoshengda, disclose the construction of a local button panel, or prove that a passive switch owns door motion or obstacle detection. The practical component decision is therefore not whether the complete vehicle system is safe. It is where the local interface package ends so every electrical and mechanical handoff can be reviewed by the correct owner.
Put only component decisions in the button-panel package
Start by naming the action that the local button requests, then map the physical part around that request. The panel can provide a stable touch point and an electrical contact path, but it does not decide whether the actuator should move.
| Decision | Button-panel package | Vehicle or system package | Evidence to review |
|---|---|---|---|
| User input | Key size, spacing, tactile structure, artwork or blank surface, backlight zone | Command priority, interlocks, software behavior and diagnostics | Function map and human-factors requirement |
| Electrical handoff | Circuit pattern, contact map, tail, stiffener and named connector | Pull-up or pull-down logic, debounce, controller input and fault response | Pinout plus mating-interface drawing |
| Mechanical integration | Panel outline, stack height, support, adhesive landing and tail exit | Door trim, brackets, moving hardware, actuator and harness retention | Door-trim section and mounting datums |
| Safety boundary | Component inspection and agreed switch-level checks | Obstacle sensing, motion limits, manual fallback and vehicle validation | System requirements and test ownership |
This separation prevents a quotation from mixing a small HMI component with the actuator, control software or complete door assembly.
Control three interfaces before choosing the final construction
First, control the touch and support interface. A raised or domed key can help a user locate the command, but the installed feel depends on the rear support, trim stiffness and local gap. State the intended finger approach, key spacing, night-use need and whether the symbol is printed, backlit or deliberately blank during an early sample.
Second, control the electrical handoff. The drawing should name the tail exit, contact side, stiffener, pitch, pin count and mating connector. Keep the tail away from clips, sharp ribs and moving door hardware. If the controller-side input circuit is not released, label the contact map and mating conditions as quotation assumptions rather than presenting them as approved values.
Third, control the installation boundary. Show the available adhesive landing, trim texture, curvature, fasteners and service access. A complete button panel may fit the opening while its tail cannot reach the fixed connector or while a trim rib changes key feel. Those are mounted-integration risks, not artwork problems.
Use a mounted sample to answer fit, feel and routing questions
A loose sample can confirm outline, surface appearance, circuit continuity and connector construction. It cannot confirm the installed result. Mount the sample on representative door trim with the intended support, adhesive and tail path. Operate every key from the expected seated position and under the expected cabin lighting.
The review should record:
- key location and tactile separation without relying on a screen response;
- installed key feel compared with the loose part;
- panel seating, edge condition and support under finger load;
- night appearance, light blocking and icon registration when backlighting is included;
- full tail bend, strain boundary, connector reach and mating access;
- clearance from actuator hardware, moving linkages and the separate vehicle harness;
- sample, trim, interface-board and drawing revisions.
This sample does not approve door motion or obstacle detection. It confirms that the local component is mounted and connected as intended so the system owner can continue vehicle-level validation.
Start an enquiry before every production file is complete
An initial enquiry can begin with the intended local command, a front photo or trim sketch, approximate panel size, mounting location, available depth, connector location, prototype quantity and annual estimate. Missing CAD is not a reason to hide the project, provided unknowns are listed honestly.
For an indicative quotation, declare assumptions for overlay material, surface finish, tactile method, circuit type, backlight concept, adhesive, tail direction, connector, tooling and sample quantity. The supplier can then identify which assumptions require a drawing or physical reference before sampling.
The sample stage needs the representative trim, mating connector or interface board, agreed contact map and approval checklist. Production release should add controlled artwork, dimensions and datums, stack construction, circuit and pinout, tail and connector specification, inspection points, approved mounted sample and change-control rule.
Ask for help at the component boundary
Baoshengda can review an automotive HMI button-panel package covering the overlay, tactile structure, membrane circuit, support layers, adhesive, flexible tail, connector and component-level inspection inputs. The vehicle maker or system integrator remains responsible for the controller, actuator, sensors, door-motion behavior, manual fallback, system diagnostics and final safety validation.
To begin, send the available door-trim sketch, interface evidence and quantities. Identify which items are released, which remain assumptions and what the first mounted sample must answer. That gives the supplier a practical starting point without presenting an unfinished vehicle system as approved.
Need help reviewing a structure?
Send your drawing, photos, application, and quantity. Baoshengda can help check the structure before sampling.
Send Drawing for Quote