
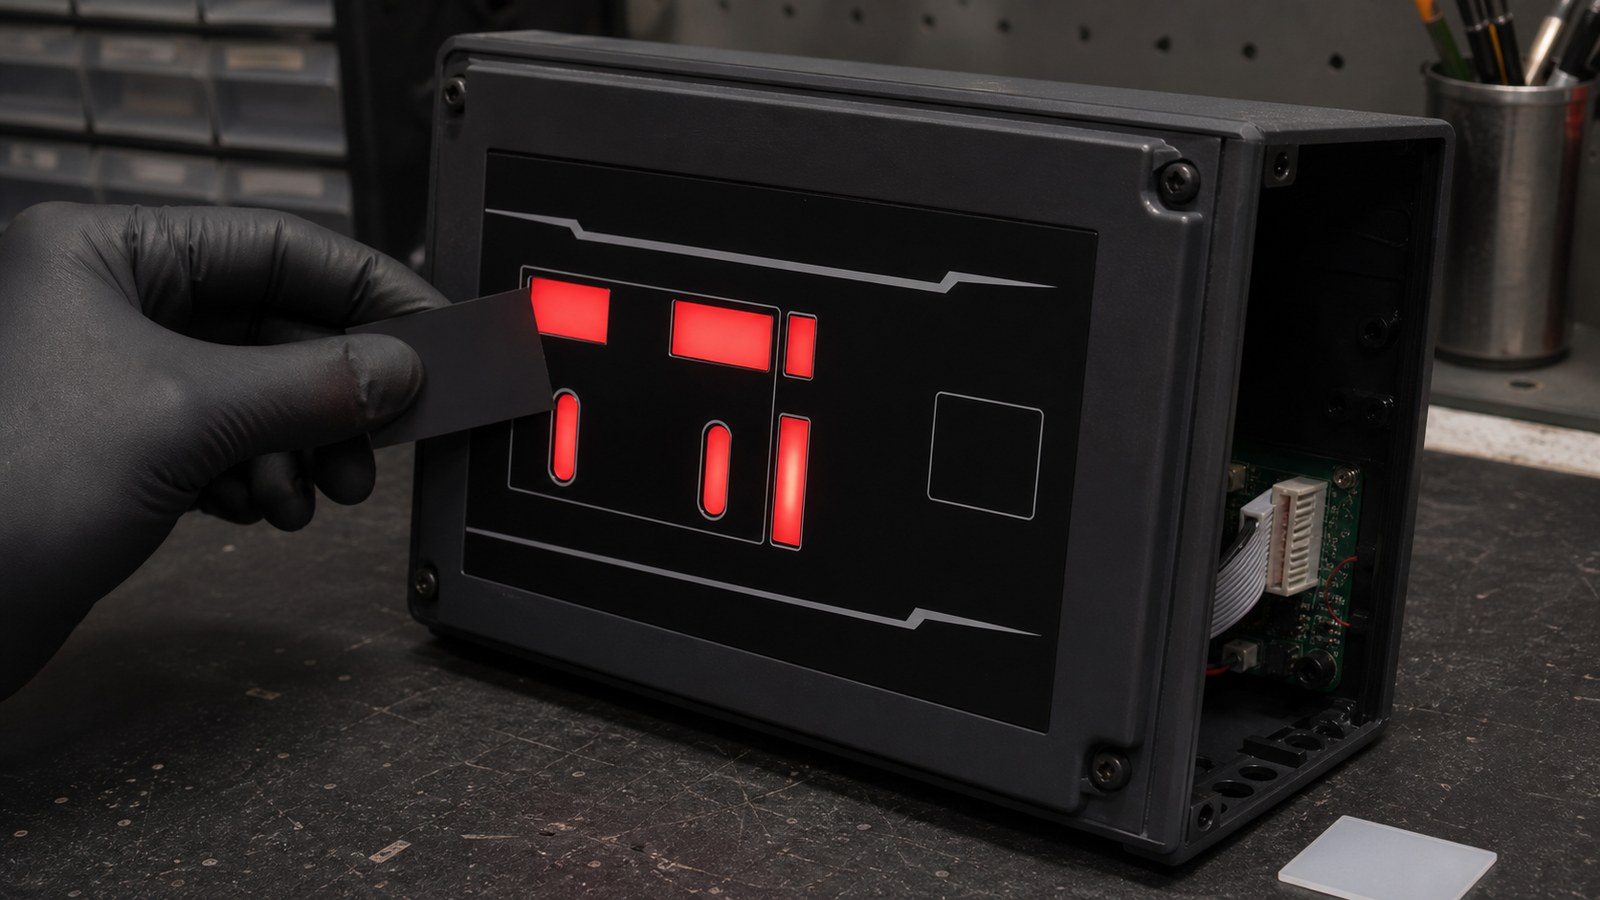
Quick answer: ask for LED zone, diffuser, light-blocking, and installed-housing checks before approving a backlit membrane switch sample. A backlit panel can pass a basic electrical test and still fail in use if one icon blooms, the edge leaks light, or the night brightness is not balanced with the product display. Baoshengda's backlit membrane switch page is the closest product reference for this buyer question.
LED placement alone does not determine whether a backlit keypad looks acceptable. The printed light-blocking layer, diffuser or light guide, spacer openings, housing depth, and viewing angle decide whether the installed panel shows hot spots, dim icons, or light leaking into the wrong zone.
What should the buyer decide before choosing LED backlighting?
Start with the use scene, not the LED type. A machine keypad, medical control face, vehicle accessory panel, and outdoor service box do not need the same brightness or icon behavior. The buyer should define whether the user needs quick night recognition, low-glare status indication, or a bright icon that remains visible near a display window.
Confirm these points before the sample drawing is frozen:
- Which icons, windows, or button areas must light up.
- Which areas must stay dark to avoid false status cues.
- Whether the panel will be viewed straight on, from the side, or through a recessed housing.
- Whether the product has a nearby display that can reflect or overpower the backlight.
- Whether the unit is used in daylight, dim rooms, vehicles, outdoor cabinets, or a mixed lighting environment.
A common failure mode is approving the front artwork first and adding LED placement later. That can create bright spots under thin legends, uneven red or white windows, or light bleeding into icons that should stay off.
How do LED zones, diffusers, and spacers affect the sample?
Backlighting is controlled by the full stack. LED position matters, but so do spacer thickness, light guide material, printed blocking layers, adhesive cutouts, embossing height, and the distance from LED to legend.
Use this comparison during the design review:
| Design choice | What it can help | What to check before sampling |
|---|---|---|
| Separate LED zones | Keeps functions visually separated | Light leak between icons and wire route space |
| Diffuser or light guide | Reduces hot spots | Thickness, color shift, and edge brightness |
| Printed light-blocking layer | Keeps dark areas dark | Registration tolerance and pinholes |
| Raised or embossed icons | Improves touch location | Shadow around the legend and dome travel |
| Window or display cutout | Helps align with a screen | Edge shadow, haze, and adhesive intrusion |
The tradeoff is stack height and cost. More light control usually means extra layers, tighter registration, or a different assembly method. If the product housing has little vertical room, discuss brightness expectation and acceptable uniformity early.
What sample checks reveal light leak and hot spots?
Do not judge the sample only under office lighting. Backlit defects often appear when the panel is installed in the actual enclosure or tested in a dark room next to the product display.
Ask the supplier to review these checks:
- Turn on one LED zone at a time and check whether nearby legends glow by mistake.
- View the panel from the normal operator angle, not only from directly above.
- Compare low, medium, and target brightness if dimming is required.
- Check dark-room hot spots, edge leak, pinholes, and color mismatch.
- Install the sample on the real housing or a fixture with the same adhesive landing.
- Press the keys while lit to see whether dome travel changes shadow or brightness.
- Check whether the tail route, connector, or PCB blocks the intended light path.
For outdoor or vehicle-related panels, add a daylight readability check. A backlight that looks strong in a dark room may still be hard to read under side light or a glossy cover lens.
When is a real enclosure test needed?
A flat sample on a desk is useful, but it does not prove the final visual result. The housing color, wall height, gasket, screw bosses, display bezel, adhesive thickness, and PCB location can all change how light appears.
Use an enclosure or fixture test when:
- The panel has a display window or dead-front icon area.
- The backlight sits near a raised bezel or recessed opening.
- The product uses a gasket or thick adhesive around the control surface.
- The tail exit crosses close to the LED board or light guide.
- The buyer needs both night visibility and daylight appearance.
One practical risk is a small housing rib blocking part of the light path. The membrane switch may be made correctly, but the installed sample still shows one weak icon. Share the enclosure drawing before tooling so the light path and tail route can be checked together.
What should be included in the RFQ package?
A useful RFQ should let the engineering team connect the artwork, LED plan, circuit, and final housing. Send more than a front image if the backlit result matters.
Include these items:
- Front artwork with lit and non-lit areas clearly separated.
- Target LED color, brightness expectation, and whether dimming is needed.
- Housing drawing, display position, gasket path, adhesive landing, and available stack height.
- Circuit drawing, tail exit direction, connector type, pitch, contact side, and PCB position.
- Expected use scene, such as dark room, outdoor cabinet, vehicle cabin, glove use, or cleaning exposure.
- Sample approval criteria for light leak, hot spots, color match, window fit, press feel, and installed appearance.
- Photos or videos from a current prototype if a previous sample had uneven light.
After this review, route the project from the article to the backlit membrane switch product page and then to Request Quote. That path helps Baoshengda review the light stack, artwork tolerance, connector route, and sample test conditions before quoting.
Need help reviewing a structure?
Send your drawing, photos, application, and quantity. Baoshengda can help check the structure before sampling.
Send Drawing for Quote